Instructions (Students)
These guides support you in getting started working digitally.
Content
Instructions
|
Creating a PDF
This page describes how you can create PDFs from Office documents.
Furthermore, you can transfer images to a laptop or desktop PC and convert them to PDF using programs such as MS Office or LibreOffice, for example. Use the tools' function to insert images into your document for this purpose and follow the instructions for export below.
The UHH provides the Microsoft Office software package free of charge here to you as students and employees. With the included program Microsoft Word, you can export documents as PDF.
Another tool you can use for free is LibreOffice Writer, which is included in the open-source software package LibreOffice. Please visit the official LibreOffice site to download the software and obtain further information, such as installation instructions.
You can find a short guide for exporting PDFs from OpenOffice here (In German).
Creating a PDF in MS Word
- Click on "File" in the top left corner.
- Now click on "Export" in the left column.
- Click on "Create PDF/XPS Document".
- Set the name of the document. To maintain the legibility of included graphics, use the default setting under "Optimize for". "Minimum size" reduces the quality of graphics too much for any contained text to remain legible.
- Click on "Publish" (or "Export").
Creating a PDF in LibreOffice Writer
Tip: To create accessible PDFs, first save your file as a Word document. Then follow the instructions above up to point 4. Then click on "Options..." and check all boxes under the heading "Include non-printable information". Confirm with "OK". Now click on "Export". Unfortunately, these options remain grayed out as long as you have not saved the document as .docx beforehand.
- Click on "File" in the top left corner.
- Go to "Export As".
- Now select "Export as PDF...".
- A menu will now open. Here you can set contained graphics to be compressed. JPG compression can safely be set to 80%. With a DPI value of 150, texts remain legible; with a lower value, however, small text can be difficult to read.
- When you are satisfied with the settings, click on "Export".
Compressing Images
This guide explains how to compress image files on Windows or Mac OS. This is useful if you want to embed many images externally (on learning platforms/websites or presentations) or share them in other ways (storage in a cloud service/sending via email), but the files take up (too) much storage space.
Good to know: The lower the quality, the smaller the file size. For large images, even strong compression usually results in an image of sufficient quality.
At this link you will find the download for "Caesium" for Microsoft Windows.
The interface of Caesium looks like this:
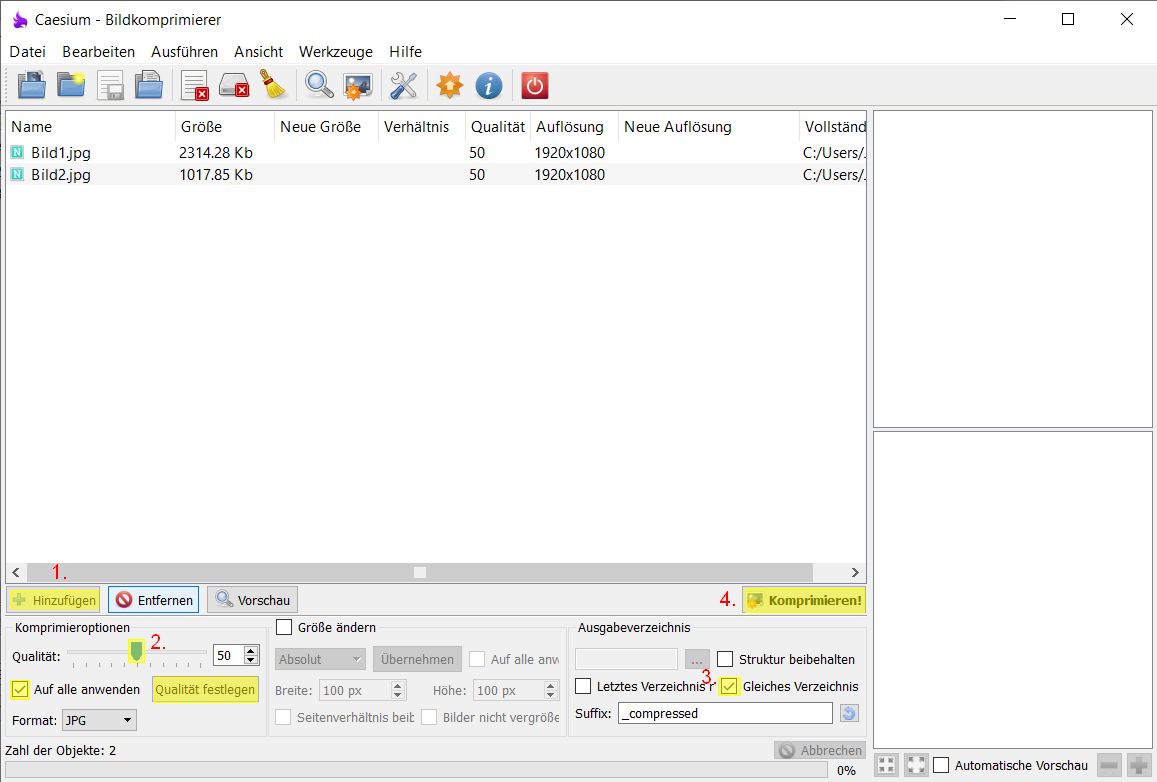 Photo: Screenshot of the software Caesium, developed by the company SaeraSoft
Windows: Caesium
To compress images with Caesium:
- Select the images you want to compress via the "Add" button. Alternatively, you can drag and drop the images directly into the application.
- In the "Compression Options" menu, you will find a slider with which you can select the resulting quality of the compressed images. If you want to apply the same compression level to all images, check the box "Apply to all". To confirm the selection, click on "Set Quality".
- Under "Output Folder", you can define where the compressed images should be saved. To create the files in the same folder where the originals are located, check the box "Same folder".
If you want to save the files in a different folder, uncheck the box and select a new folder via the "[…]" button.
By default, the compressed files are given the suffix "_compressed" to distinguish them from the originals. This can be changed in the "Suffix" text field. - Once you have made all settings, the images are compressed one after the other by clicking on "Compress!". At the end of the process, you will receive a message, and the file sizes of the compressed images will be displayed in the list of images to be compressed under "New Size".
- Finally, you will find your compressed images in the location you set.
Mac OS: Preview
In Mac OS, the standard installed program "Preview" can be used for image compression.
To compress images with Preview:
- Open the image to be compressed with Preview and click on "File" in the top bar and on "Export" in the drop-down menu.
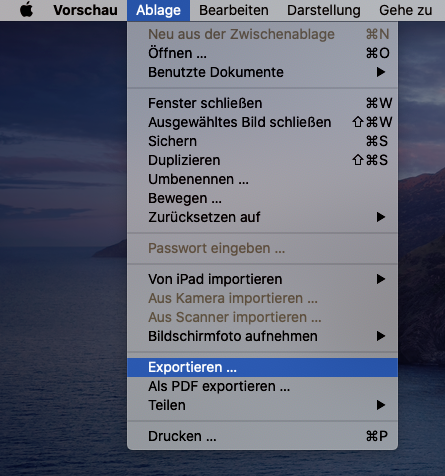 Photo: Screenshot of the menu of the software Preview, developed by the company Apple
- In the menu that opens, select a file name for the image to be compressed, as well as the location where you want to save it. You can then select the quality of the compressed image using the slider. The resulting file size is displayed directly. Clicking on "Save" creates the compressed image.
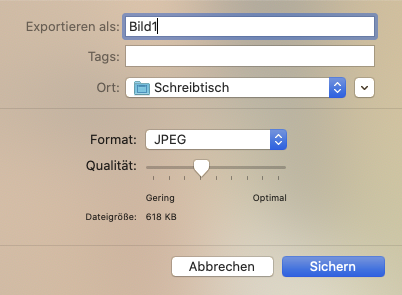 Photo: Screenshot of the export menu of the software Preview, developed by the company Apple
- Finally, you will find your compressed image in the location you set.
Compressing Video
Video Compression with HandBrake
This guide explains how to compress video files using the program HandBrake. This can be useful if you want to embed the video externally (on learning platforms/websites or presentations) or share it in other ways (storage in a cloud service/sending via email), but the file is too large for this or takes up too much storage space.
|
The interface of HandBrake looks like this:
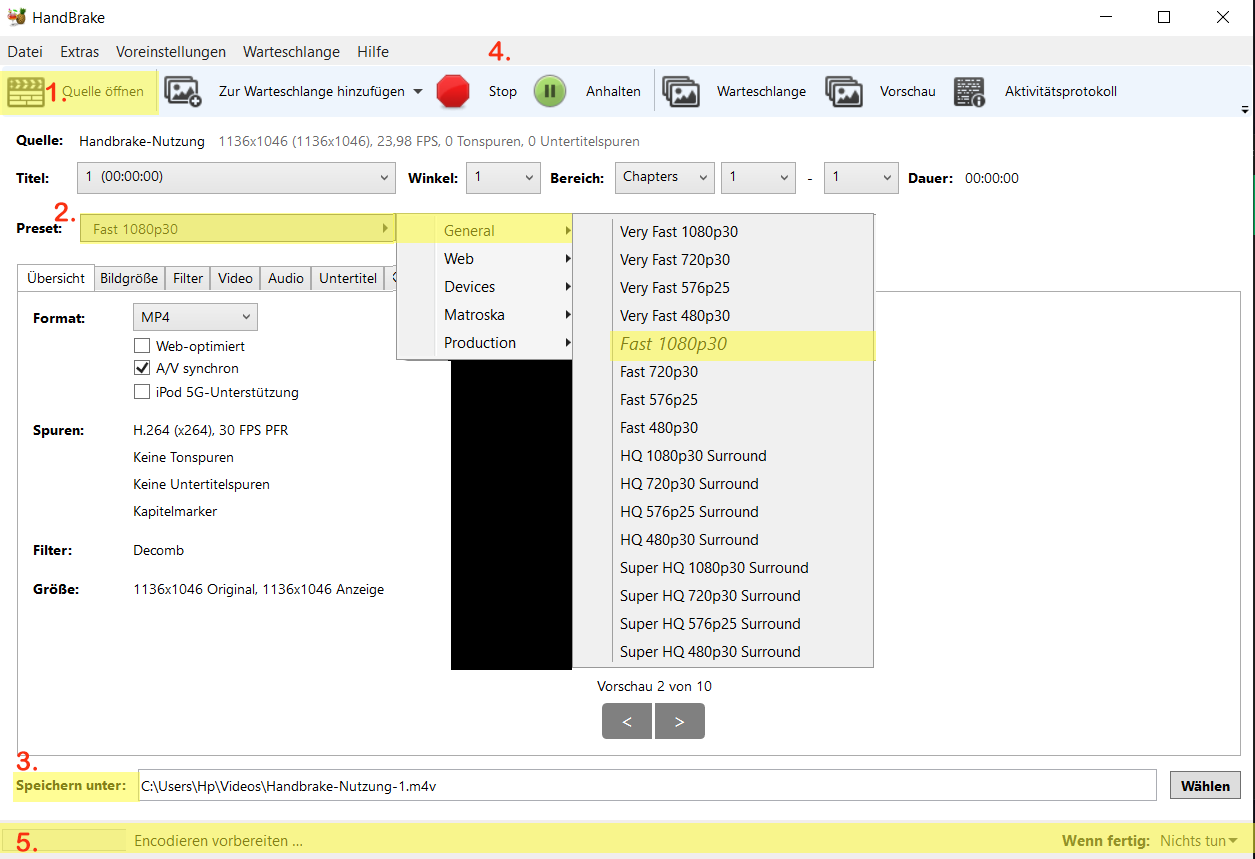
Proceed as follows for video compression (the numbers correspond to the markings in the screenshot):
- Select the source video via “Open Source” or drag and drop it directly into the application.
- Under “General” and then “Preset”, you will find various preset templates for the file format of your video. We recommend the common format “Fast 1080p30” (highlighted in the screenshot), which plays without problems in most video players and should also be embeddable externally without issues.
- Here, the storage path (destination) for the newly created video can be defined.
- Start/Pause/Stop – here you can begin, pause, or cancel the re-encoding of the video. Since an encoding was in progress, the “Start” option is not visible.
If multiple videos are to be processed one after the other, they can also be collected via “Add to Queue” at the top and then accessed via “Queue” to start their encoding – this is practical when dealing with a lot of video material, as it can then be encoded, e.g., during a lunch break or overnight. - At the bottom, the status of the ongoing encoding process is displayed with an approximate remaining time.
How long this takes depends on the size of the source video and the performance of the computer used. During this time, the PC may react sluggishly and the ventilation (fans) may ramp up – this is normal. If these effects are too disturbing, see the queue option in step 4.
Finally, you will find your compressed video in the location you set.
Adjusting Volume
Audio Level Adjustment with MP3Gain
MP3Gain is open-source software that adjusts the volume of audio files.
Before you start: The original file is overwritten during this process. Therefore, create a backup copy if you do not want to lose the original file.
Instructions for Windows
- Download the installation file and run it.
- Leave the setting on the option Custom. English is selected as the language in the settings; you can also select German here.
- Select the installation path, run the installation, and finish it.
- First, load the file(s) whose volume you want to adjust via Add Files.
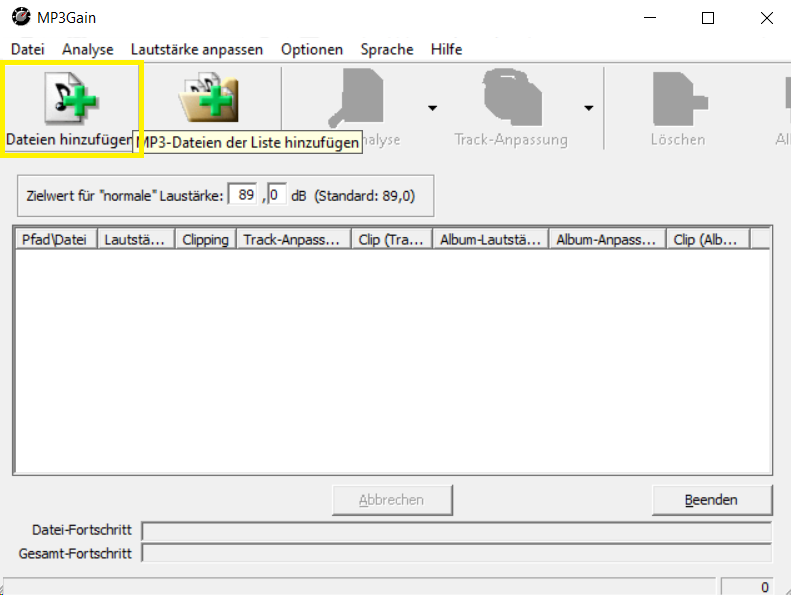 Photo: Screenshot of the software MP3Gain, developed by Glen Sawyer
- In the next step, adjust the target volume as desired. A value of 89.0 dB is preset; we recommend keeping this value or raising it arbitrarily up to 94 dB (this is an average value).
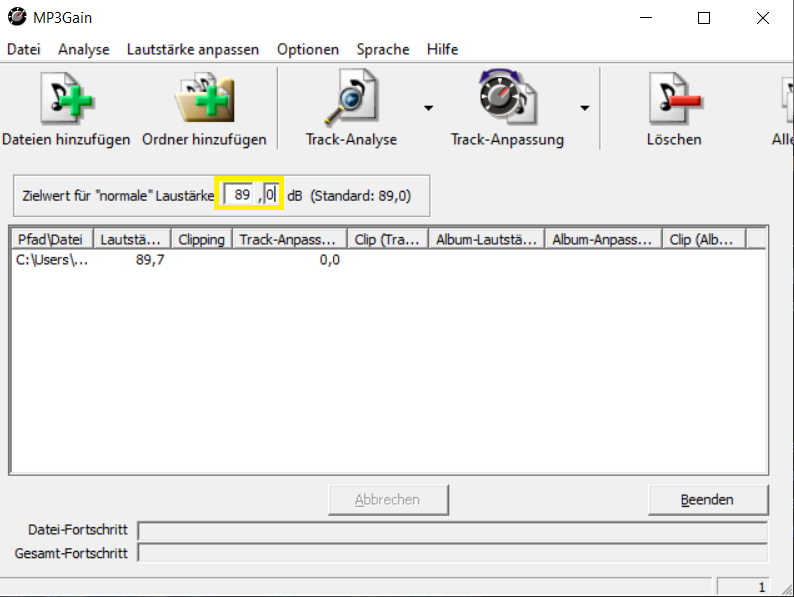 Photo: Screenshot of the software MP3Gain, developed by Glen Sawyer
- Then click on Track Gain to output the file. The program now adjusts the volume of the file and saves the new file.
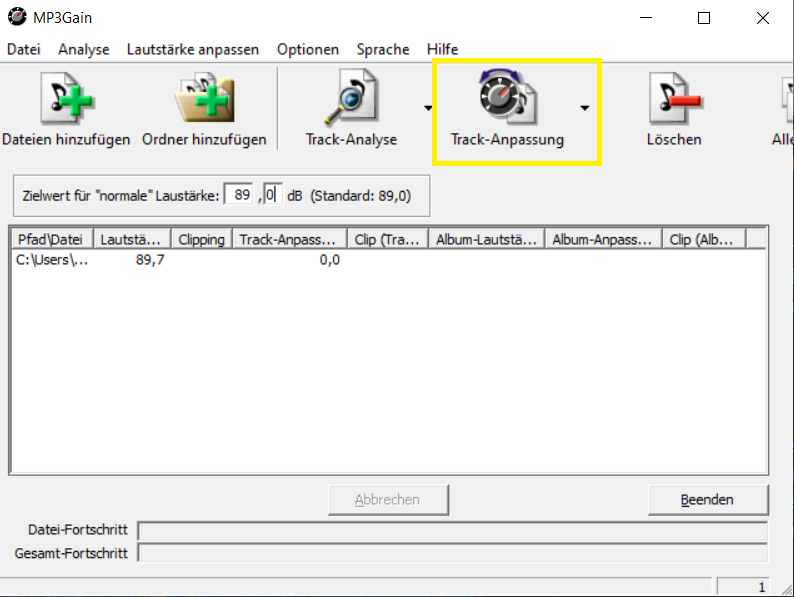 Photo: Screenshot of the software MP3Gain, developed by Glen Sawyer
The original file is overwritten during this step.
Instructions for Mac
- Download the .zip file and run it.
- The program icon MP3Gain Express now appears in the folder where you saved the .zip file. Start the program with a double-click.
- If you receive a prompt asking if you really want to open Mp3Gain Express, confirm by clicking Open.
- First, load the file(s) whose volume you want to adjust via Add file(s).
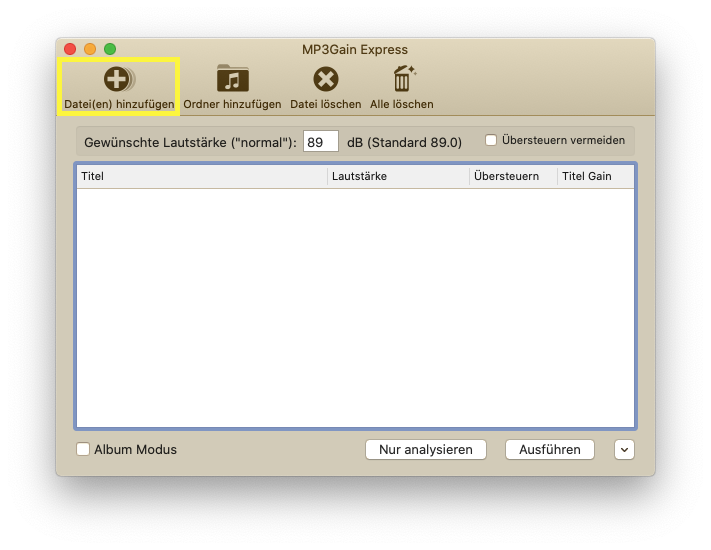 Photo: Screenshot of the software MP3Gain, developed by Glen Sawyer
- In the next step, adjust the target volume as desired. A value of 89.0 dB is preset; we recommend keeping this value or raising it arbitrarily up to 94 dB (this is an average value).Photo: Screenshot of the software MP3Gain, developed by Glen Sawyer
Then click on Apply to output the file. The program now adjusts the volume of the file and saves the new file.
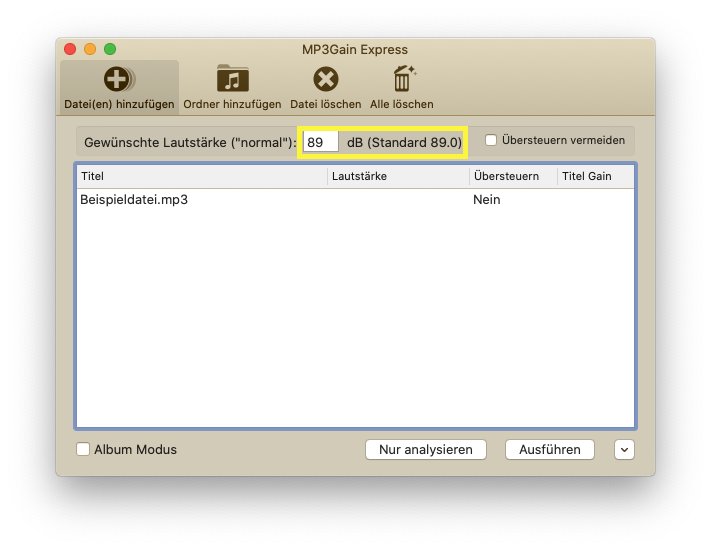 Photo: Screenshot of the software MP3Gain, developed by Glen Sawyer
- Then click on Track Gain to output the file. The program now adjusts the volume of the file and saves the new file.
 Photo: Screenshot of the software MP3Gain, developed by Glen Sawyer
The original file is overwritten during this step.